Tuesday, May 19, 2020

Pipes

Among the effects of the Corona virus was the cancellation of a week long class I had planned to take with Jill Kertulla.  Jill makes fiber art beginning with photos on fabric, and then she manipulates them in many ways to create her own fabulous vision.

I was SO looking forward to the class, and SO disappointed.  I don't take disappointment well, so here's how I handled the situation:

1. I had already ordered and received my images on fabric, and gathered all the supplies for the class.
2. Jill had written an article about some of her methods, which was published in Quilting Arts magazine
3. I decided that I would fearlessly proceed on my own, using what I had already gathered and Jill's advice from the article.

One of the images I had printed was of some water pipes.  My daughter is involved in the technology aspect of water movement, and so I had taken several photos of pipes, wheels, and chains.  They are interesting sculptural forms, and I planned to do some fabric collage studies of them.


Here is the image I started with:


This is what I had printed onto fabric:


Not knowing what I was doing, I began painting the blue pipes with transparent fabric paint:


Here is how it looked when the pipes were all painted:


Then, I auditioned fabrics for the sidewalk and grass areas.  Some would add color, some were sheer and would add texture or pattern.


One of the techniques Jill recommended was trapunto, or adding an extra layer of batting to certain areas that you want to look raised.  I stitched around the wheel to make it puffier.  Here is how it looked on the back after trimming away the extra batting:


Next, I made a paper pattern for the grassy area.


I wanted to try Jill's method of weaving strips of fabric, so I cut some slits into this piece:


Because the woven areas were flimsy and floppy, I secured them on the back with some iron on stabilizer.  (Learning as I go!)  The yellow flowers are part of my ironing board cover.


If you look closely, you can see what I've added to the sidewalk areas.  Cheesecloth, patterned tulle, printed fabrics, machine and hand stitching.


More hand and machine stitching to flatten the background areas, and to add textural interest:


Here, I've added some dyed string to the lower sidewalk area.  I knew I would find a use for that string I saved from a shibori process!!  I've also added some embroidered and appliqued details.


Here is the piece with the facing added and waiting to be hand stitched on the back.

I plan to give this to my daughter to hang in her office.  I'm glad I tackled this project!  I look forward to trying another image using these techniques.  On this first one, I didn't stray far from the original photograph.  Now I have more courage and will try making some more artistic changes to the next image.

Thank you Jill, for attempting to teach our group, and for your guidance and inspiration!!


Monday, January 20, 2020

Miss Peach

I think we had a hamster named Miss Peach once.  Anyway, it seemed a good name for the portrait I recently made on my longarm quilting machine.  Peach was not made in my normal slow way of designing.  Usually, I work on my vertical design wall and spend many days cutting, pinning, standing back to look, adjusting, studying, trimming, patching, changing my mind, and then finally, over several days, handstitching each piece onto the background, then quilting the three layers together. 
With the new method, I can bypass some of the steps, and get a quilt designed, and quilted in one day. I began with a backing fabric, batting, and part of a beautiful hand-dyed damask tablecloth - all pinned to my longarm frame.  I then chose some fabric prints that I thought 'went with' the background. 


I made an effort to limit the colors to only a few, and I included various size motifs.  I used one fabric for a contrasting background shape at the top.
I then began cutting shapes for the shoulders, neck and head, and then moved on to the features.  Instead of pinning, I just placed the shapes onto the background, and tried not to sneeze.
Here is Peach before she got hair.

 
With this method, I am designing horizontally, at about chest level.  This makes it impossible to stand back and squint at the composition, as I am used to doing.  To get a good look at what is happening, I have to climb up on a ladder and take a photo.
Peach looked a bit better with her hair added.


The next step is to carefully cover the entire design with tulle, and then quilt heavily over all in order to hold all the loose pieces in place.  I had a gauzy fabric from a dress, which I wanted to audition.


Nope. Too foggy!  So I went with a peach colored tulle, which is nearly transparent.  I pinned the tulle along the edges, and quilted all over.  Here she is after the quilting.


I took her off the machine, added a facing, and took a good look.  Oh, dear, she has a beard.  Normally, it wouldn't bother me to have flowers or polkadots or birds or any motif on the face, but this time, the random placement looked like either a beard or some bad scrapes on her chin.  Not despairing, I got out some paint and stamps, and set out to obscure the dark flowers. 
Here is the final version.


I may have gotten carried away with the stamping.
So, I think I will try this method again.  It is a huge timesaver.  When I do, I will take more time to study the composition before beginning the quilting. 
I'm still much more comfortable with my slow process, but sometimes, it's nice to be able to finish a project more quickly.  (And I still took the time to add a bit of hand stitching at the end!)

Wednesday, January 1, 2020

Recap 2019

Our priest said that we should look back on what we accomplished during the past year, and evaluate how we could do better in 2020.  I decided to look through photos to see what I was able to make quiltwise last year.  Here are some of the highlights:

 In January, I was invited to show a collection of my portraits at the World Quilt Show in Tampa.  Here is one of four sections of my work:


This photo shows three in progress pieces which have all been completed now, and are either traveling with exhibits or designated to do so.


This is a quilt titled Sliders, which will travel with the SAQA global show called Aloft.  It shows me and my son John, a few years back.


I took a class with the wonderful Betty Busby in January, 2019.


Here is a quilt that I made afterward, titled Leaf Dance:


I decided to give two OLD quilts to the dog shelter in order to clear some space in my studio.  Here is one of them, which I made for my son when he was small.  It was difficult, but had to be done.


I participated in a slice quilt with five other quilters.  Here is the result:


Here are a couple of quilts that I started in classes I taught, and then completed later.


I was hired to make three quilts using doggie bandanas that the owner had saved.  Here is one of them:

This one was started for a call for entry called Wild Fabrications.  I didn't finish it in time to enter, but I finished it this year!  Titled Namaste.


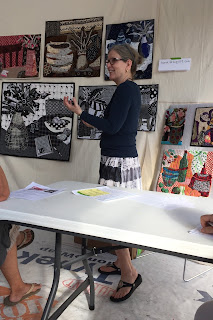
I took a class from the wonderful Pat Pauly, and made some super screen printed fabrics.  Here is Pat, and a quilt that I made using some of those fabrics:


I also taught classes in several locations both in and outside of Florida this year.  Check my website www.kquilt.com to see what classes are available, or email me at karol@kquilt.com


I took a class with the fantastic Paula Kovarik. She invited her students to come visit her in Memphis, and two of us did just that!!


I got to play with Pamela Allen in Memphis:


I was moved to create two large lap quilts for friends who are fighting cancer this year.  I hope they feel the love inside:


There are a few that I can't reveal yet, as they are being made for competitions.  Here is a peek at three of them:


This year I completed a King sized bed quilt that I started MANY years ago.  It felt GREAT!!


I started work on a book for my group Cloth in Common.  I'm hoping to wrap it up very soon.  You'll be able to see all of the work that was completed by eleven artists over a two year period.  I also started an Instagram page for the group.


I collaborated with two other artists on a project involving sea creatures and poetry (and another book).


I don't have wall space for all of my quilts, but this one, Pond, gets to hang in my living room.


Every now and then, I add to this Scrap City, because I hate to throw anything away.


I made a jacket.


And a kimono shaped quilt.


For Christmas, I made each of my children a bed quilt.


It was a terrific year.  There were many magical moments.  I got to travel, visit friends and family, see fabulous art, take loads of photos,  sold some work, wrote some magazine articles, and passed on the gift of art to others.  I look forward to more of the same in 2020!!